How to Create Automatic WooCommerce Cart Discounts
Table of Contents
- Why automatic cart discounts matter for WooCommerce stores
- Benefits of cart discounts
- Setting up basic discount rules with WooCommerce native features
- Enhancing WooCommerce discounts with CheckoutWC tools
- Making native discounts more visible
- Floating cart with real-time coupon application
- Free shipping progress bar
- Creating automatic discount opportunities with order bumps
- Enabling discount displays
- 10 tips for effective cart discounts
- Tracking discount performance with these key metrics
- Upgrade your WooCommerce checkout experience today
Managing discounts in your online store can feel like juggling – you want to offer attractive deals to your customers, but keeping track of different discount rules, making sure they work correctly, and managing the backend can be tricky.
That’s where automatic cart discounts come in. Instead of requiring customers to hunt down and enter coupon codes, these discounts apply themselves automatically when certain conditions are met. This creates a smoother shopping experience that customers love.
In this guide, we’ll show you how to set up and optimize cart discounts in WooCommerce. You’ll learn how to use WooCommerce’s built-in discount features and enhance them with CheckoutWC‘s tools for better discount visibility in your cart and checkout. We’ll also cover the order bump feature, which lets you create strategic upsell opportunities right where customers are most likely to see them.
Why automatic cart discounts matter for WooCommerce stores
Unlike traditional coupon codes that customers need to remember and type in, automatic cart discounts do the work for them. These smart discounts apply price reductions automatically when shoppers meet specific conditions during checkout – no copy-pasting required!
Think of automatic cart discounts as your store’s helpful assistant, watching the cart total and applying discounts whenever customers qualify. For example, when someone adds $100 worth of products to their cart, they might automatically get 10% off their entire order. Or if they add 5 items, free shipping kicks in without them needing to do anything.
Here are some popular ways to use automatic cart discounts:
- Spend $50, save 15% on everything (threshold-based percentage).
- Buy 3 t-shirts, get $10 off (quantity-driven fixed discount).
- Orders over $75 ship free (free shipping unlock).
Benefits of cart discounts
Adding automatic cart discounts to your store brings several powerful advantages:
- Lower cart abandonment: When shoppers see automatic savings appear in their cart, they’re more likely to complete their purchase instead of leaving items behind.
- Bigger orders: Customers often add extra items to reach discount thresholds, increasing your average order value.
- Fresh faces: New customers are drawn to stores offering automatic savings, helping you expand your customer base.
- Returning customers: The convenience of automatic discounts encourages shoppers to come back for more.
- Smart selling: Use discounts to guide customers toward complementary products or premium options.
- Inventory management: Clear seasonal or excess stock quickly with targeted discounts.
- Higher profits: While you might earn less per item, increased sales volume often leads to better overall profits.
Here’s what makes automatic discounts special: While many stores focus on offering bigger discounts, the surprise factor of automatic application often creates more excitement than larger manual discounts. It’s like finding money in your pocket – unexpected savings feel more rewarding than discounts you have to work for!
Setting up basic discount rules with WooCommerce native features
Right out of the box, WooCommerce comes with a built-in coupon system that helps you create discounts for your store. It’s not very flexible (nor automatic), but it still gives you a lot of options, so it’s worth exploring a bit to see whether what they offer is enough for your needs.
Generally, you have two main options: Create coupons that people have to enter manually or discount the price for certain products and categories from your WooCommerce backend. Let’s begin with a basic discount coupon:
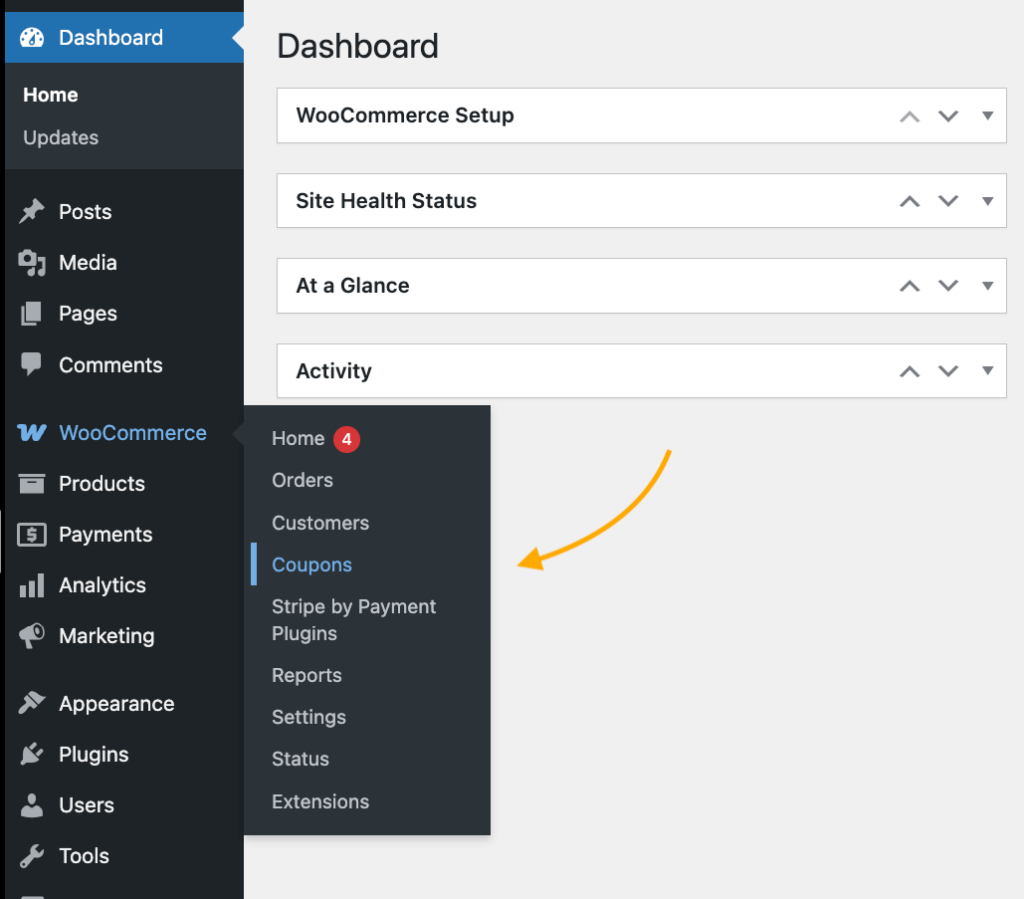
- Go to Marketing > Coupons in your WooCommerce dashboard.
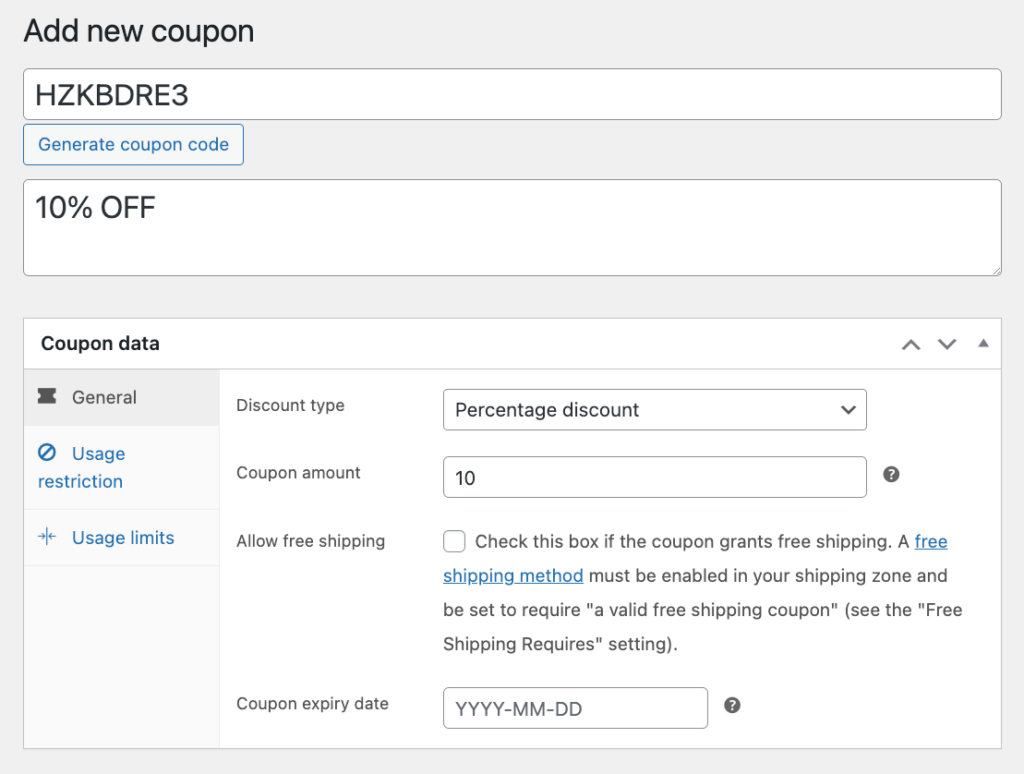
- Click “Add coupon” and set your discount type and amount.
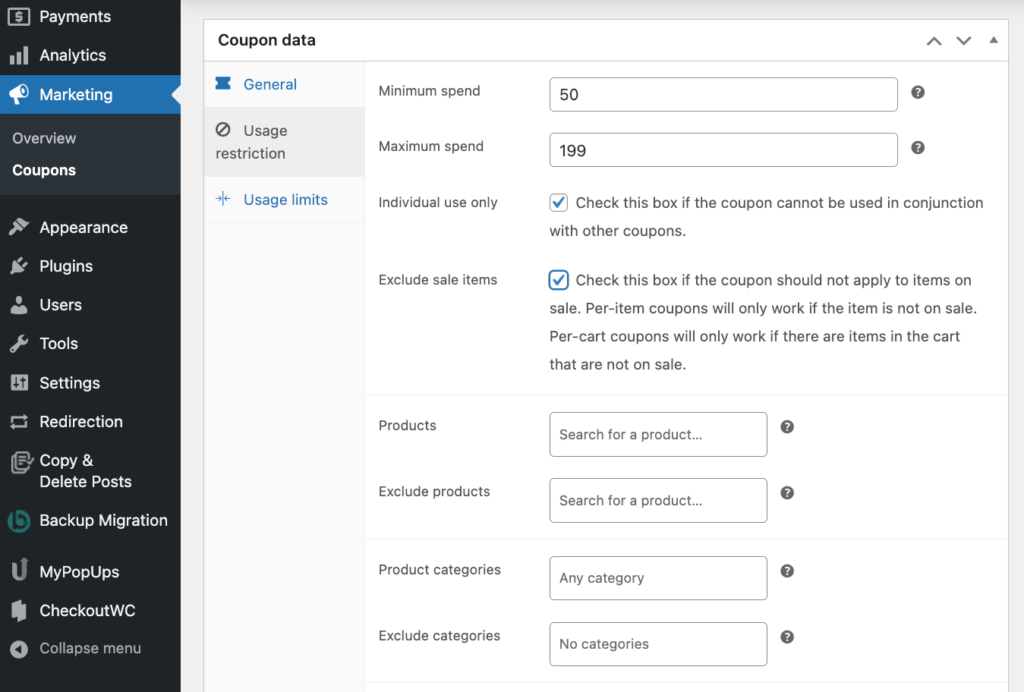
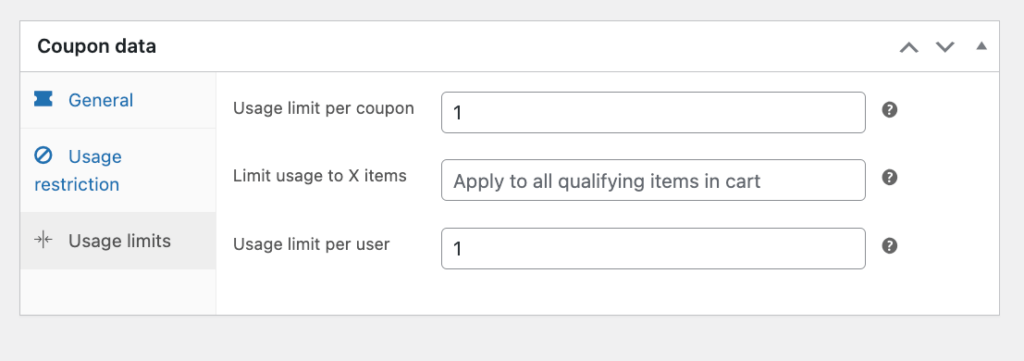
- Configure the coupon usage restrictions – the minimum and maximum spend to activate the discount, if it can be used with other coupons, if it should automatically exclude items already on sale, or if it should be restricted to a specific product or category.
- Adjust the usage limits – do you want this to be a one-time coupon for a singular customer or something they can use over and over again?
- Publish and share your coupon code.
You can adjust the above settings to fit your needs. For example, you can set up fixed cart discounts that take a set amount (like $10) off the entire cart total. This is perfect for sitewide promotions. You can also create fixed product discounts that reduce specific items by a certain dollar amount, which is useful when you want to move particular inventory.
Your other option is to create a sale in WooCommerce by setting lower prices for specific products, categories, or your entire store.
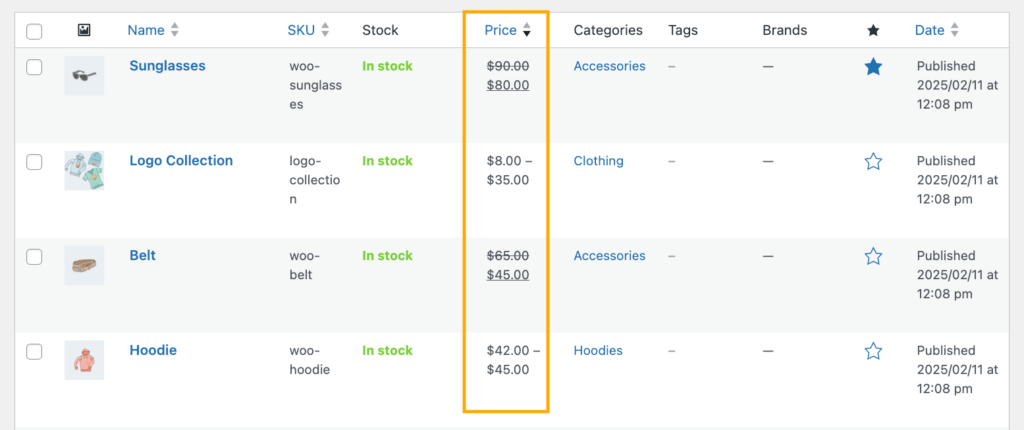
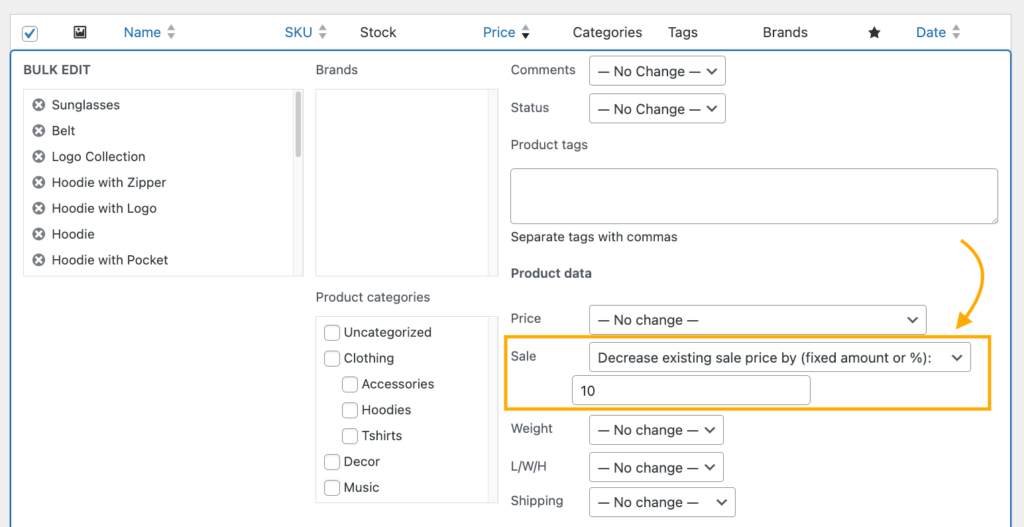
You can do this by selecting all the products you want to create the discount for and bulk editing their sale price.
This approach has several benefits – it immediately encourages sales and repeat purchases, and helps clear out excess stock without relying on coupons.
Keep in mind that the native features do have some limitations: Customers need to manually enter coupon codes, you can’t create automatic cart-based rules, and you’ll need plugins for more advanced targeting options like quantity-based discounts, scheduling sales, user-based discounts, and more. You also can’t add special discount messages on eligible products or apply several conditions to a discount, e.g., 10% OFF for all wholesalers that purchase more than 500 units of a specific product or category.
These limitations are the reason why most store owners look for alternatives such as discount plugins, which are many great options out there. If you find native WooCommerce too restrictive for your needs, try out some plugins and see what works best for you. In any case, make sure you test any new plugin to make sure that it works with your existing setup and the different payment gateways you’re using.
Enhancing WooCommerce discounts with CheckoutWC tools
CheckoutWC doesn’t just replace your standard WooCommerce checkout – it enhances how discounts work in your store through two distinct approaches: Improved visibility for existing discounts and new ways to create targeted offers.

The simplicity of Shopify with the power of WooCommerce. Replace your WooCommerce checkout page with CheckoutWC to boost sales and reduce cart abandonment.
Making native discounts more visible
Floating cart with real-time coupon application
The floating cart feature transforms how customers interact with discounts. When shoppers enter a coupon code, the savings apply instantly without a page refresh, maintaining shopping momentum. The discount appears right before their eyes, clearly showing the value they’re getting.
To enable these:
- Go to WP Admin > CheckoutWC > Side Cart and toggle “Enable Side Cart.”
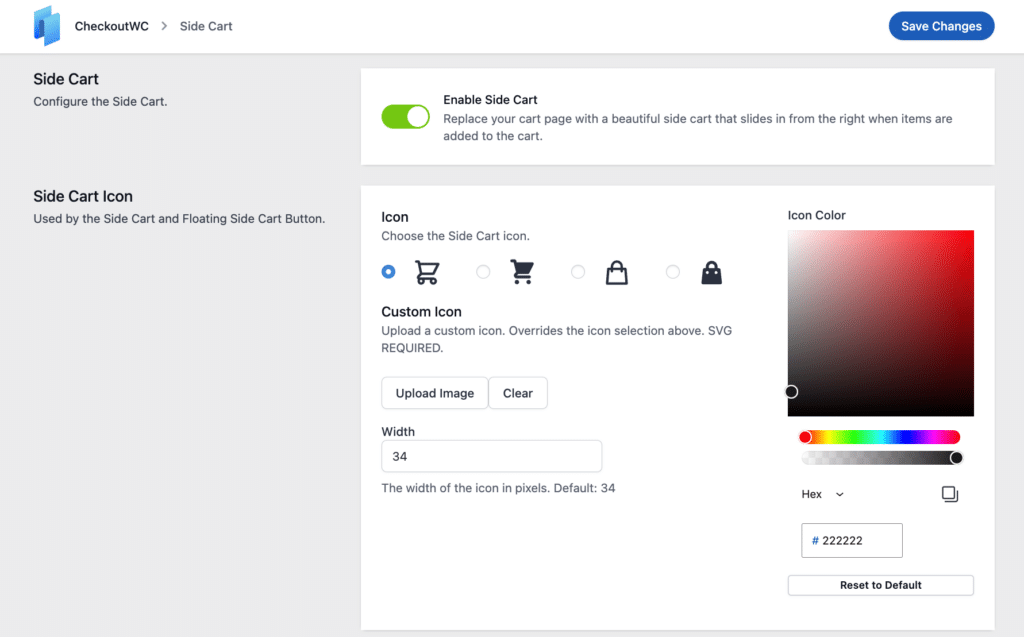
- Check “Enable Floating Cart Button.”
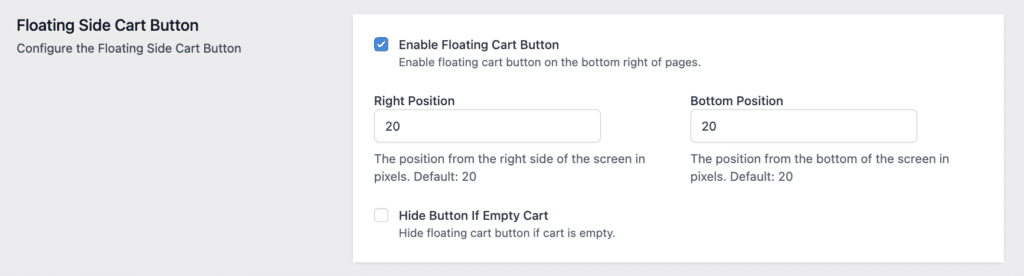
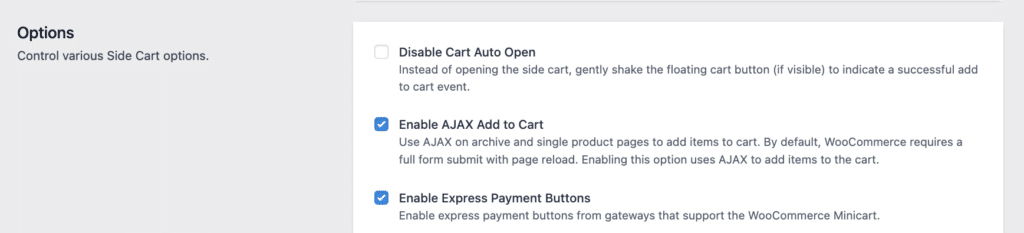
- Choose your preferred button position and adjust any advanced settings. Make sure that AJAX is enabled because otherwise, clients will have to manually reload the page to see their updated cart.
- Save your changes and test your side cart to make sure it appears as you need it to.
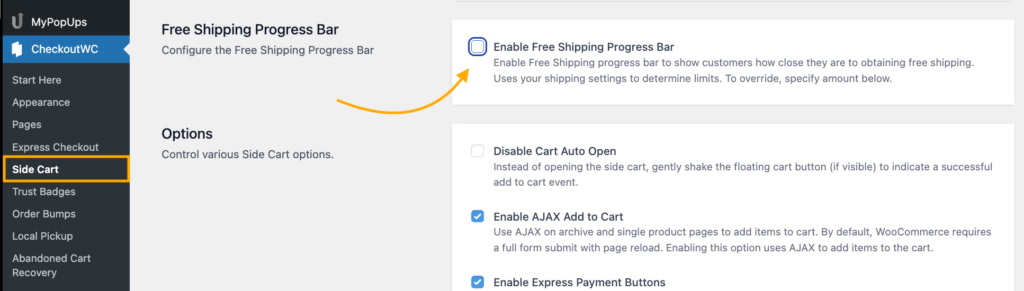
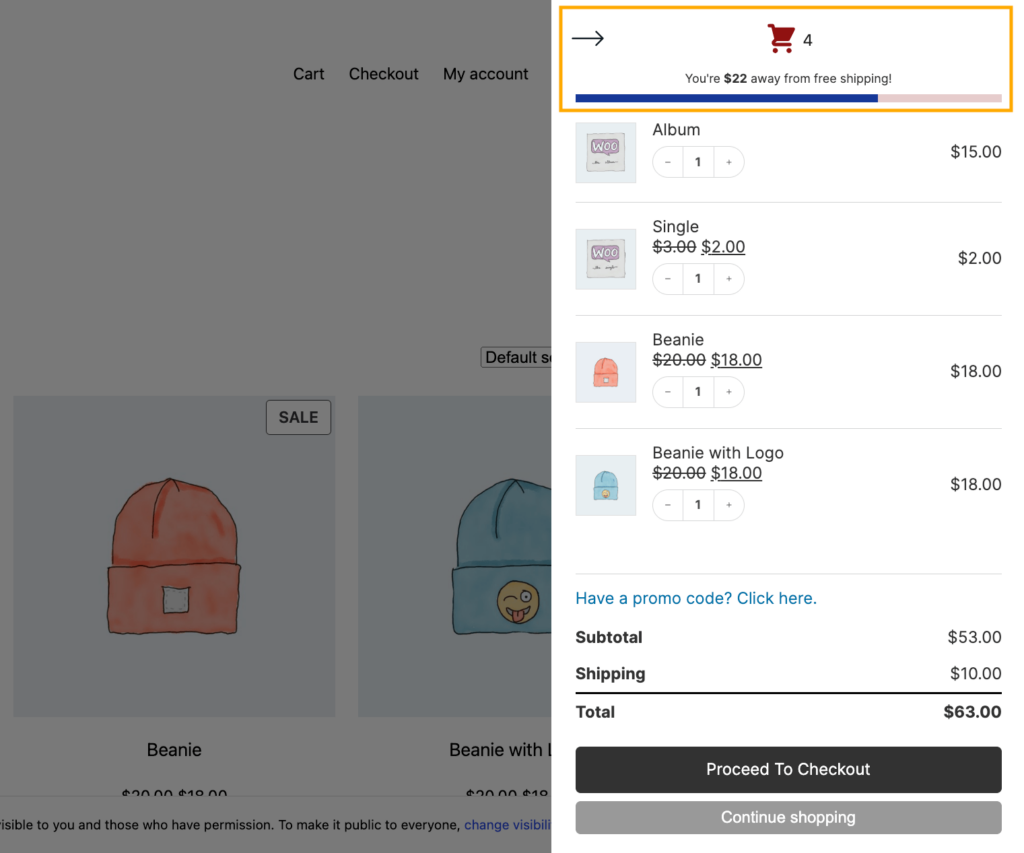
Free shipping progress bar
This visual motivator shows customers exactly how close they are to unlocking free shipping. As they add items, the bar updates in real-time, with clear messaging about the remaining amount needed. Store owners report this simple visual cue significantly increases average order values as customers add “just one more item” to reach the threshold.
This visual tool shows shoppers how close they are to free shipping, encouraging larger purchases. To set it up:
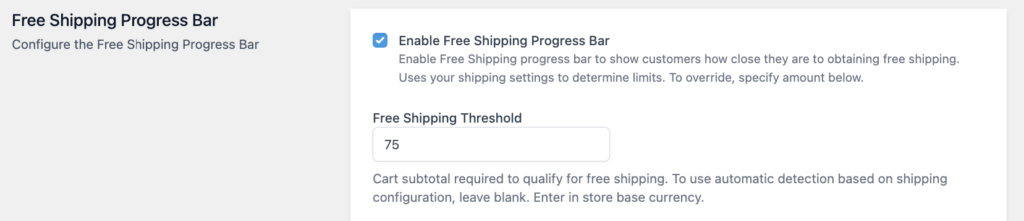
- Navigate to WP Admin > CheckoutWC > Side Cart and find “Enable Free Shipping Progress Bar.”
- Set your free shipping threshold amount.
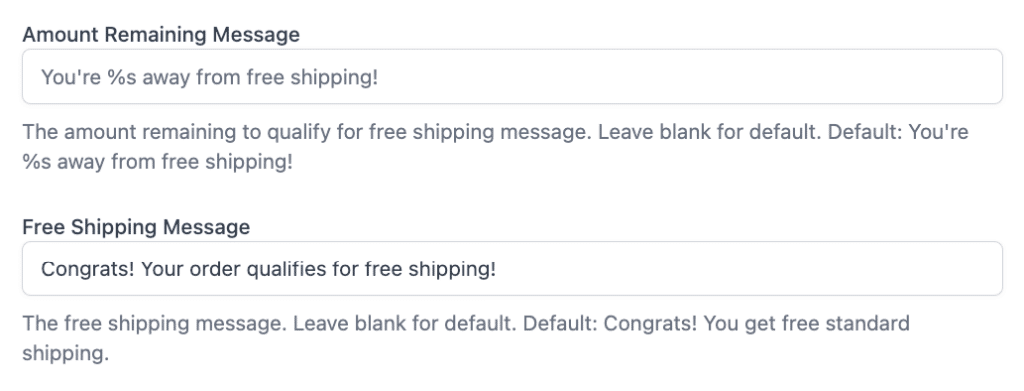
- Customize your progress messages.
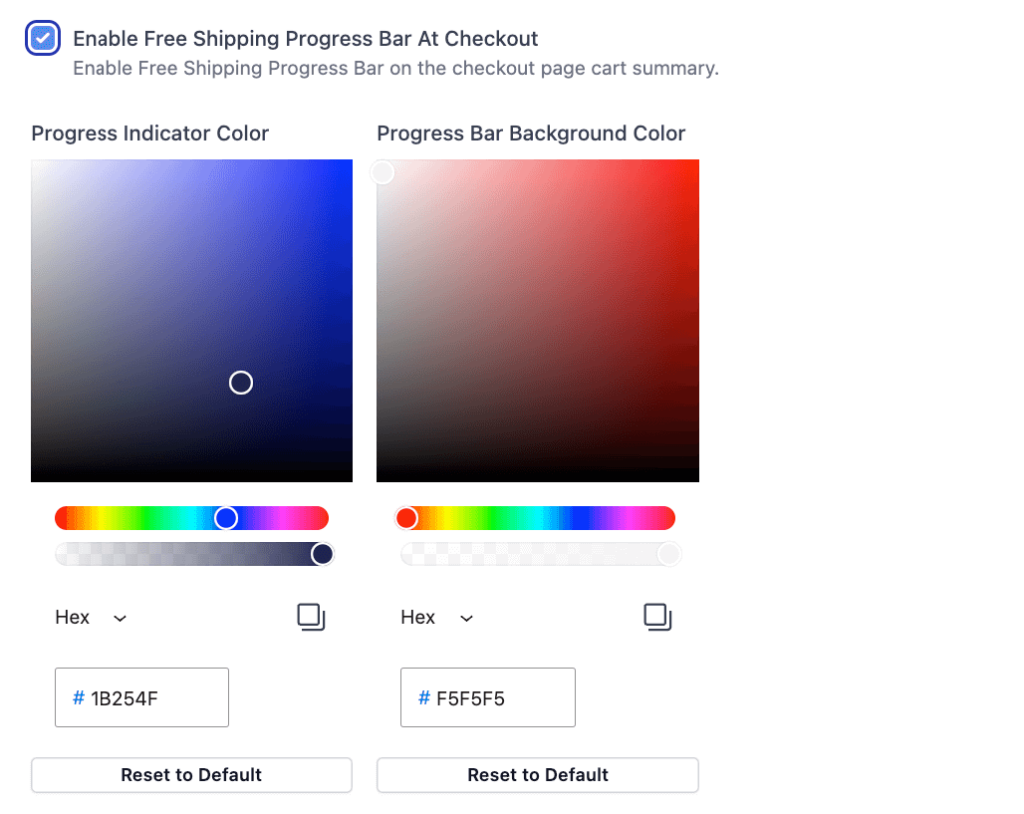
- Pick your progress bar colors, and if you want, you can enable the bar to show up at checkout.
- Save changes and test.
Creating automatic discount opportunities with order bumps
Order bumps work differently from traditional discounts – they’re targeted product offers with special pricing that appear at strategic points in the shopping journey. For example, you can:
- Offer discounted phone cases when someone buys a smartphone.
- Present reduced-price warranties at the final checkout step.
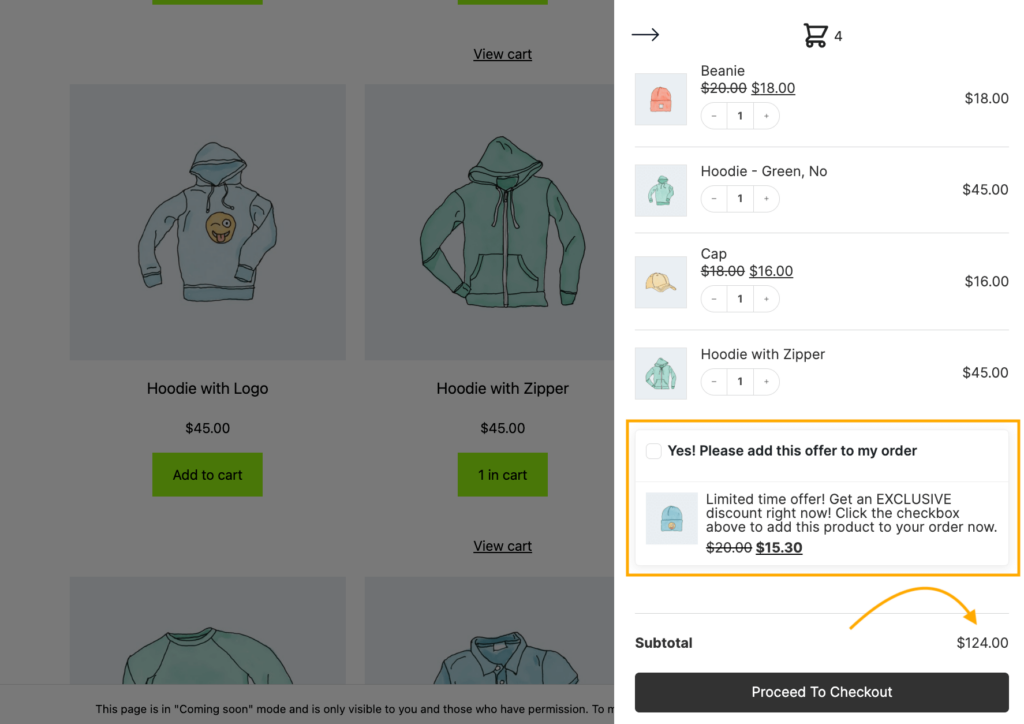
- Show complementary items with special pricing in the side cart.
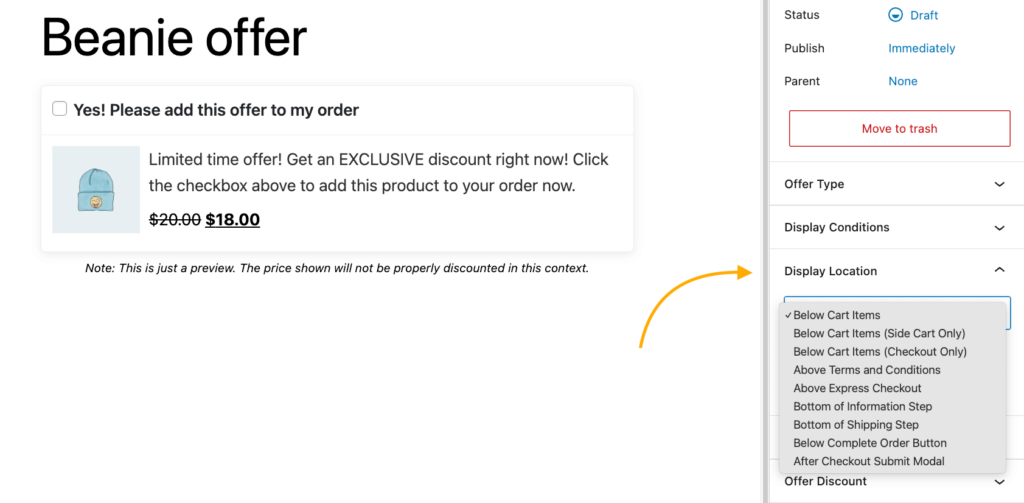
With order bumps, you apply the discount (fixed amount or percentage) directly to the bump product based on the triggering rules you define. You control exactly where these offers appear:
- Below the cart items.
- Above the terms and conditions.
- At the bottom of the shipping step.
- Below the “Complete Order” button.
- After the checkout submission.
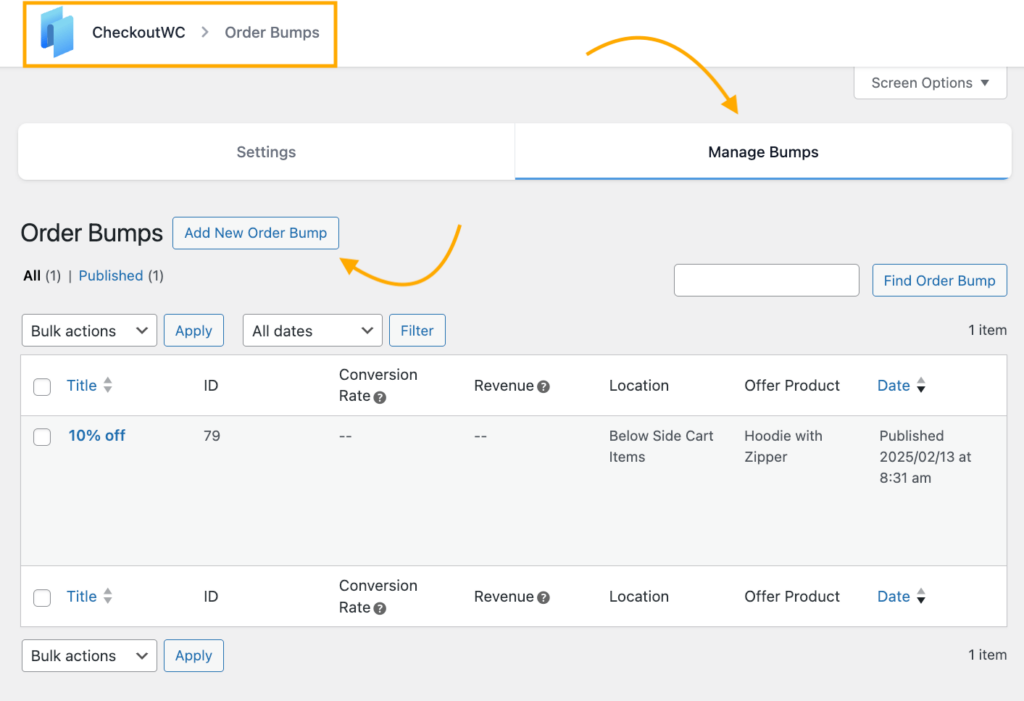
To create a bump:
- Go to WP Admin > CheckoutWC > Order Bumps > Manage Bumps > Add New.
- Select your product and discount type.
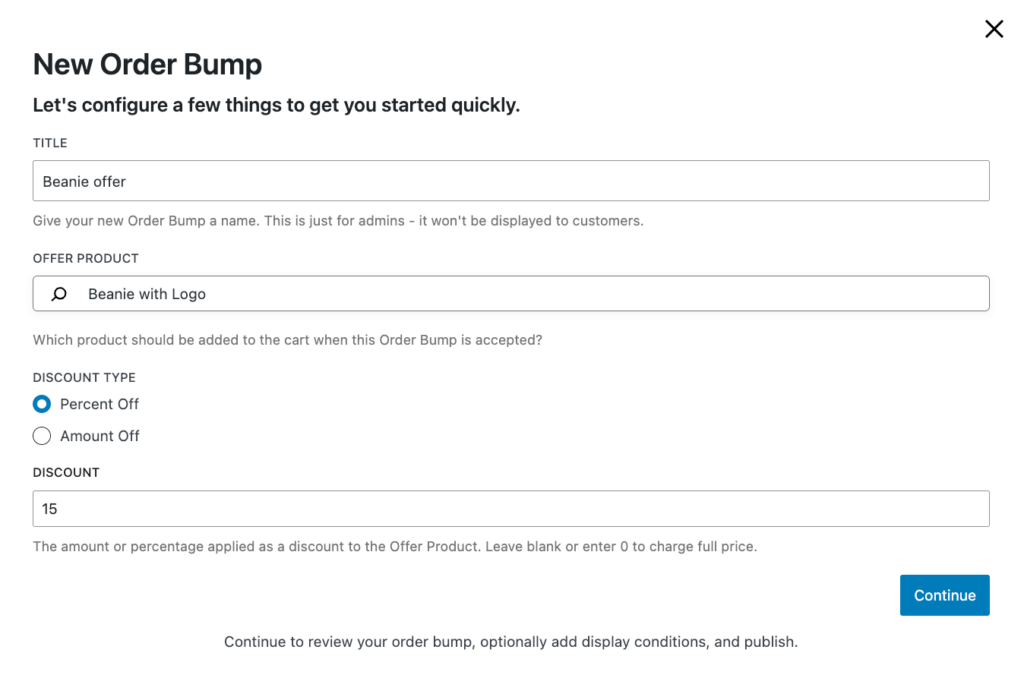
- Choose your display location.
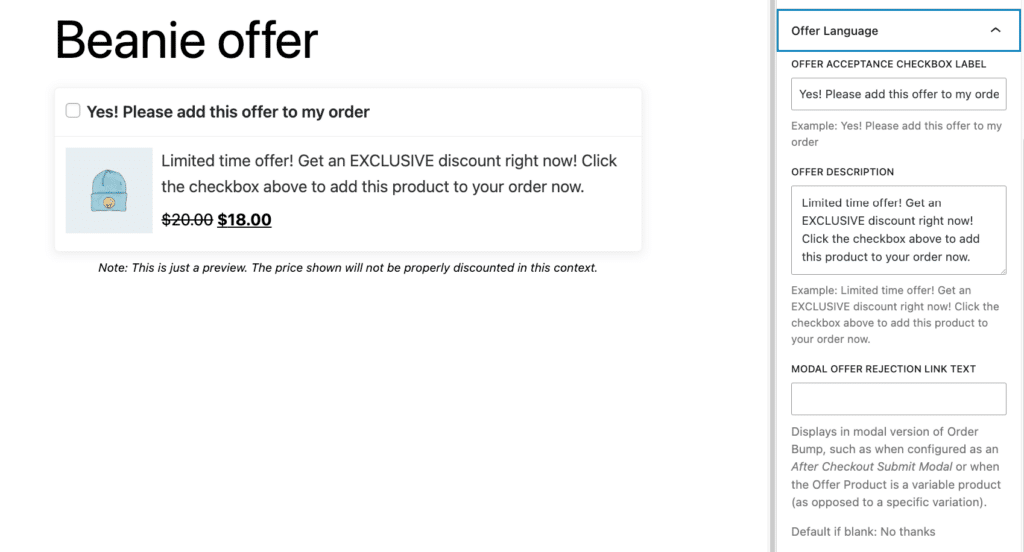
- Write a compelling offer description.
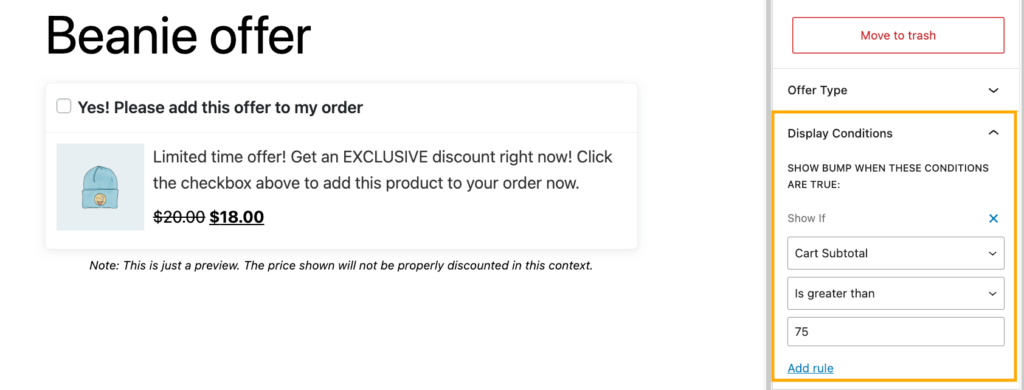
- Set any display conditions – for example, you can set a cart minimum.
- Save your bump and check if everything works on the front end.
Enabling discount displays
Make sure customers see their savings clearly in both cart and checkout:
- Head to WP Admin > CheckoutWC > Side Cart.
- Check “Enable Sale Prices.”
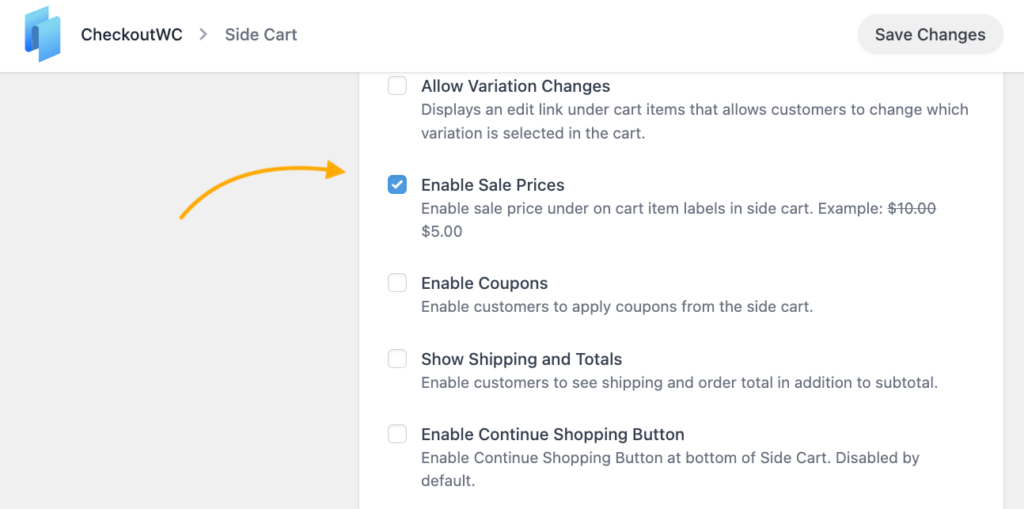
- Save all changes and check if everything is working on the front end.
Both approaches – enhanced visibility and strategic order bumps – work together to create a more effective discount strategy that boosts conversions while maintaining healthy margins. For additional discount customization, you can also pair CheckoutWC with specialized extensions like Smart Coupons.
10 tips for effective cart discounts
Setting up cart discounts can feel overwhelming – there are many factors to consider, like timing, amounts, and targeting. But with the right approach, you can create discounts that both delight customers and boost sales. Here are the essential best practices to follow:
- Know your audience: Study your customer data to understand buying patterns. If data shows your fitness enthusiasts often buy supplements, create targeted discounts on complementary items for this group.
- Build urgency: Limited-time offers push customers to act. Try running a 24-hour flash sale or countdown timer for special promotions. For example: “Only 6 hours left: 20% off all workout gear!”
- Make terms crystal clear: Avoid confusion with simple, straightforward terms. Instead of “Get 15% off orders over $75 excluding selected items,” try “Spend $75, save 15% on everything.”
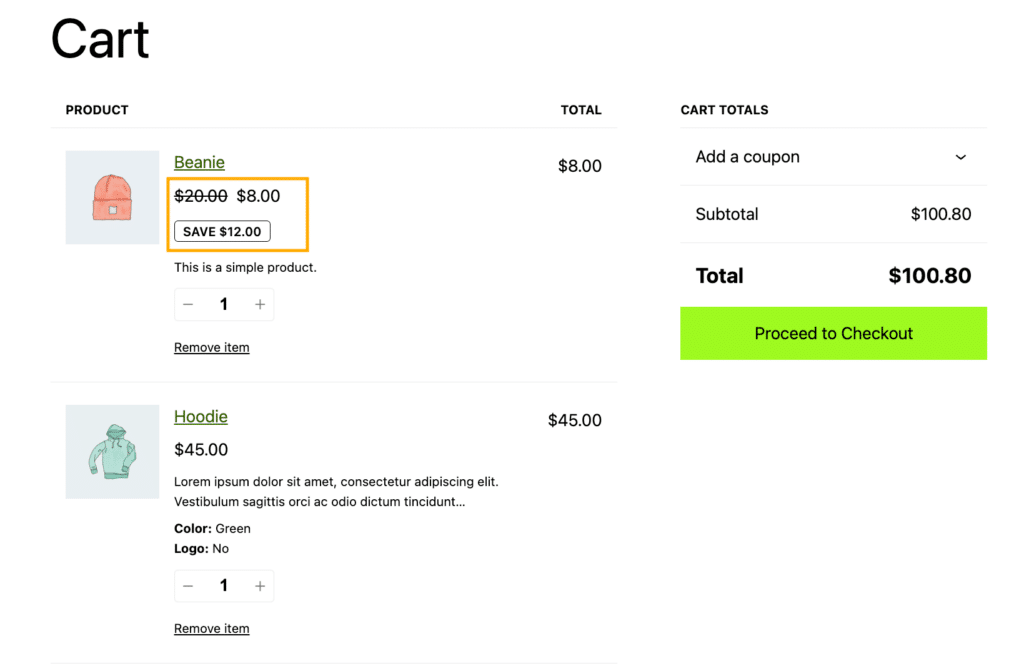
- Show the savings: Display both original and discounted prices. When customers see “
$100$75″, they immediately grasp the $25 savings. - Track performance: Monitor key metrics and use this data to fine-tune your discount strategy (more on that in a little bit!).
- Align with goals: Match discounts to specific business objectives. Want to clear winter inventory? Offer deeper discounts on seasonal items.
- Personalize offers: Group customers by behavior and send them relevant deals. First-time visitors might get a welcome discount, while loyal customers receive VIP offers.
- Don’t overdo it: Too many discounts can devalue your products. Keep offers special by spacing them out.
- Time it right: Plan discounts around natural buying seasons like holidays or back-to-school periods.
- Spread the word: Share your discounts everywhere – email, social media, and your website. Make sure customers don’t miss out on great deals.
Tracking discount performance with these key metrics
Measuring your discount performance helps you understand what’s working and what needs tweaking. Here are the essential metrics to watch and what they tell you about your discount strategy:
- Total sales: Compare revenue during promotions to normal periods. For example, if your usual weekly sales are $10,000, and during a discount week, you hit $15,000, you can clearly see the promotion’s impact – even after accounting for the discount margins.
- Cart abandonment rates: The industry average sits at 70.19%, which means that if your abandonment rate drops from 65% to 55% during a promotion, your discount strategy is likely hitting the mark. Keep testing different discount types to find what works best.
- Average Order Value (AOV): Monitor whether discounts truly drive bigger purchases. If your normal AOV is $50, and during promotions, it jumps to $75, you’re successfully encouraging larger orders rather than just discounting existing purchases.
- Conversion rates: Sharp increases during promotions signal an effective strategy. If your usual 2% conversion rate doubles during a sale, you’ve found a winning formula.
- Customer Acquisition Costs (CAC): Factor in promotional costs when calculating CAC. If you’re spending more on discounts but gaining loyal customers, it might be worth the investment.
- Return on Investment (ROI): Compare your discount costs against revenue gains. If a 10% discount costs you $1,000 but generates $5,000 in extra revenue, that’s a clear win.
“Spend some time analyzing product category performance and see whether different discount types resonate with different product segments. For instance, threshold-based discounts might drive significant AOV increases in one category, while percentage-based offers perform better in others. This granular understanding allows you to fine-tune their promotional strategies for maximum impact.”
– Ian Misner, General Manager at Kestrel
Remember to identify your “discount sweet spots” – you might find that 15% off drives nearly the same volume as 20% off, letting you protect margins while maintaining sales momentum.
Upgrade your WooCommerce checkout experience today
WooCommerce provides solid foundations for discount rules, but CheckoutWC takes your strategy further with both enhanced visibility tools and its own discount creation features. This powerful combination leverages WooCommerce’s discount engine while adding CheckoutWC’s engagement capabilities to create a more effective shopping experience.
WooCommerce manages your coupon codes and sale prices, while CheckoutWC makes these discounts more visible through its floating cart and free shipping progress bar. But CheckoutWC goes beyond just displaying existing discounts – its order bump system creates entirely new discount opportunities through targeted offers with special pricing at strategic moments in the customer journey.
Ready to boost your store’s performance? Here’s your action plan:
- Set up your core WooCommerce discount rules first.
- Enhance discount visibility with CheckoutWC:
- Enable the floating cart for real-time coupon application.
- Implement the free shipping progress bar.
- Create additional discount opportunities:
- Design order bumps with special pricing for complementary products.
- Position these discounted offers at key decision points.
- Track performance metrics and refine your approach.
With CheckoutWC, you’re implementing a dual discount strategy – making your existing WooCommerce discounts more effective while creating additional promotional opportunities through order bumps. Get started with CheckoutWC today!
The simplicity of Shopify with the power of WooCommerce. Replace your WooCommerce checkout page with CheckoutWC to boost sales and reduce cart abandonment.