How to Easily Remove Shipping from the WooCommerce Checkout
Table of Contents
- Why and when to remove shipping from WooCommerce checkout
- How to remove the shipping step with CheckoutWC
- Configuring your shipping zones for better order management
- 1. Setting up new shipping zones
- 2. Adding shipping methods to shipping zones
- 3. Managing existing methods
- Get started with simpler shipping today
Want to know a surprisingly common reason why customers abandon their online purchases? It’s not price or product quality – it’s a complicated checkout process. In fact, the Baymard Institute found that 22% of shoppers give up when checkout becomes too complex.
When you only offer one shipping method, making customers select it at checkout is an unnecessary step that can cause confusion. It’s just adding friction for no reason!
In this article, we’ll show you how to use CheckoutWC to automatically apply your shipping method, creating a faster, smoother path to purchase for your customers.
The simplicity of Shopify with the power of WooCommerce. Replace your WooCommerce checkout page with CheckoutWC to boost sales and reduce cart abandonment.
Read on to learn how to:
- Remove the shipping step from checkout to reduce up to 22% of cart abandonments.
- Configure CheckoutWC to automatically apply shipping methods based on your business needs (local pickup, predetermined zones, or billing address shipping).
- Set up your shipping zones correctly in the backend to ensure smooth order processing and accurate shipping costs.
Why and when to remove shipping from WooCommerce checkout
While removing fields from your store might seem counterintuitive, sometimes less really is more, especially when it comes to checkout optimization. Here are some common business scenarios where removing shipping options from your checkout page makes perfect sense:
- Local pick-up-only businesses: Local businesses like furniture stores and bakeries often offer only in-store pickup. In these cases, shipping options only add clutter to your checkout page. Your customers already know they need to pick up their couch or wedding cake in person, so displaying shipping choices complicates their checkout experience.
- Predetermined shipping zones: Predetermined shipping zones are a common WooCommerce setup where stores assign specific shipping methods to different regions. For example, you might have standard shipping for US customers and international shipping for EU customers. Your customers can’t actually choose between these options because their location determines their shipping method automatically. Even though you have multiple shipping methods set up, customers within each zone only have access to one option, making the selection process unnecessary.
- Shipping to billing address: Forcing shipping to match the billing address cuts unnecessary data entry in half. Your customers won’t need to type the same information twice, but you’ll still get all the delivery details you need. This simple change reduces speeds up checkout.
Removing shipping options from your checkout isn’t just about having fewer form fields. It actually allows you to a checkout experience that shows customers exactly what they need based on their specific purchase. When customers see only relevant information, they can complete their purchase more efficiently.
This approach also solves another common problem. Customers who see only one shipping method at checkout might wonder if they’re missing other options or if something’s wrong. Removing the shipping selection entirely and applying the appropriate method automatically eliminates this potential confusion.
How to remove the shipping step with CheckoutWC
CheckoutWC is a WooCommerce plugin that helps you optimize your checkout page. It replaces the default WooCommerce checkout with improved templates and adds features like upsells, trust badges, and abandoned cart recovery emails.
Among these features, you have the option to remove unnecessary checkout fields and steps, including the shipping step. Here’s how to do it:
- Install and activate CheckoutWC.
- Navigate to CheckoutWC > Pages.
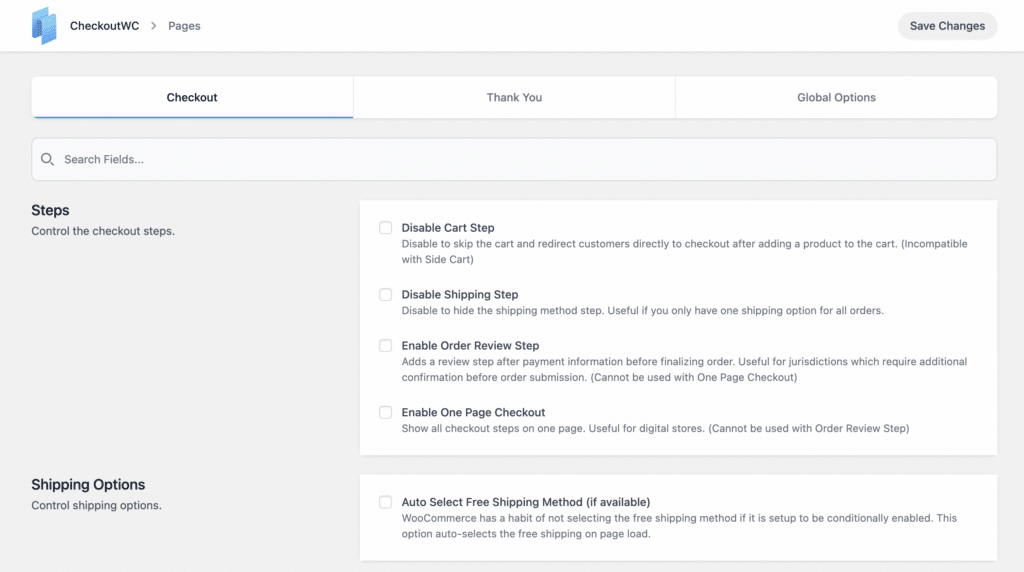
- Find and check the Disable Shipping Step option.

- Save your changes.
You can also set up automatic free shipping selection. Just go to CheckoutWC > Pages > Shipping Options to configure this feature.

For developers and store owners who need more control, CheckoutWC can be extended with custom code. For example, you can hide shipping options for specific product categories – check out our tutorial for step-by-step instructions. Our documentation includes many other examples of how to customize shipping display rules.
P.S. Before launching any checkout changes, run a few test orders to ensure everything works with your store’s configuration.
Configuring your shipping zones for better order management
Now that we’ve removed the shipping selection step from checkout, let’s ensure your backend shipping configuration supports this streamlined experience.
“Automating shipping selection is only half the equation. The real success comes from strategic zone configuration. Starting with highly specific zones and working outward prevents shipping cost errors and reduces confusion for both customers and order fulfillment teams. When shipping costs are clearly displayed and accurately calculated, customers are more likely to complete their purchase.”
– Beka Rice, Product Architect at Kestrel
Here’s how to set up your shipping zones:
1. Setting up new shipping zones
- Go to WooCommerce > Settings > Shipping > Shipping Zones.
- Click Add zone.

- Enter a descriptive Zone Name.

- Select Zone Regions by choosing from:
- Countries
- States/Provinces
- Continents
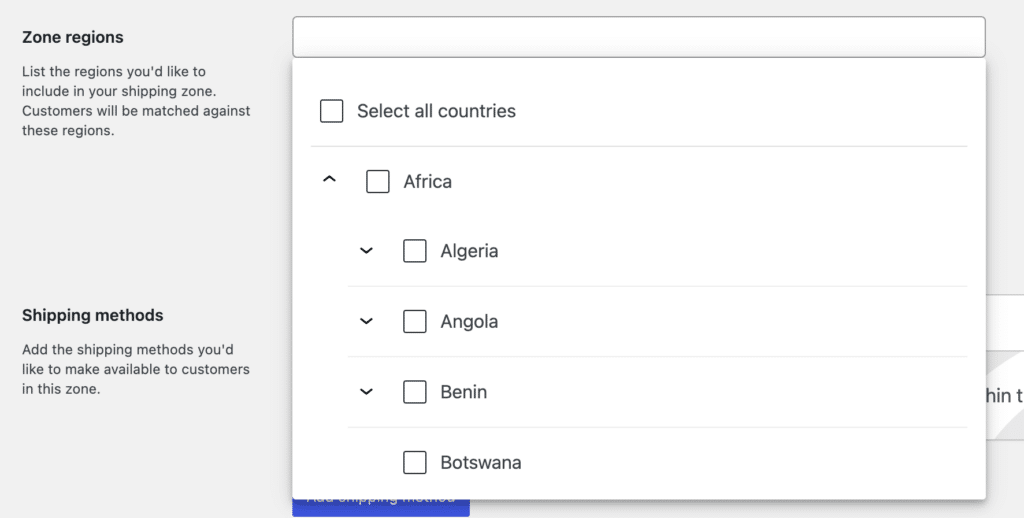
- Optionally, you can select Limit to specific zip/postcodes if you need to restrict shipping to certain areas.

- Save your changes.
2. Adding shipping methods to shipping zones
- Navigate to your shipping zone.
- Select Add shipping method.

- Choose between Free shipping, Flat rate, or Local pickup.
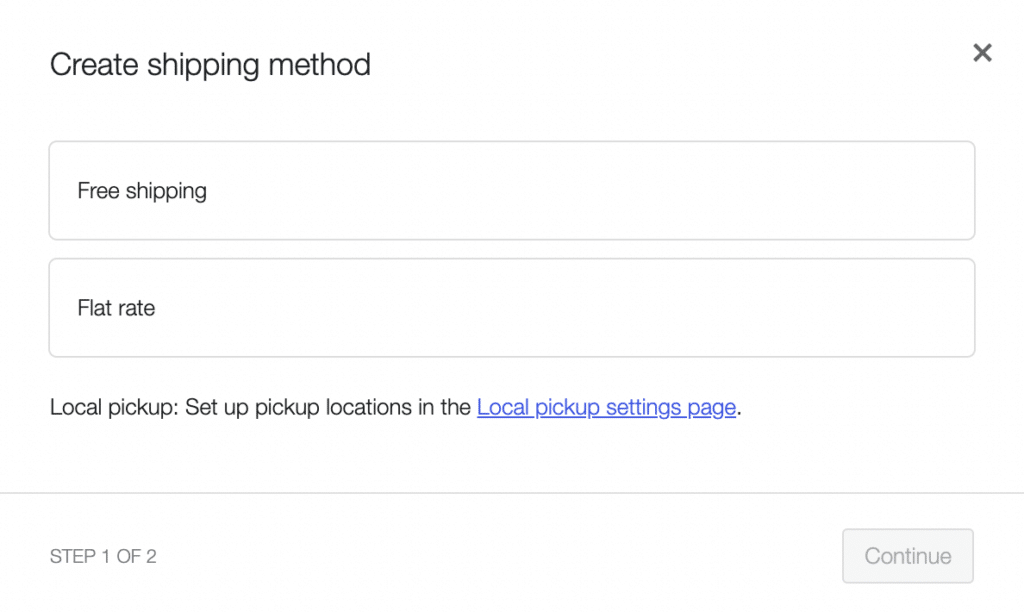
- Configure the method’s settings.
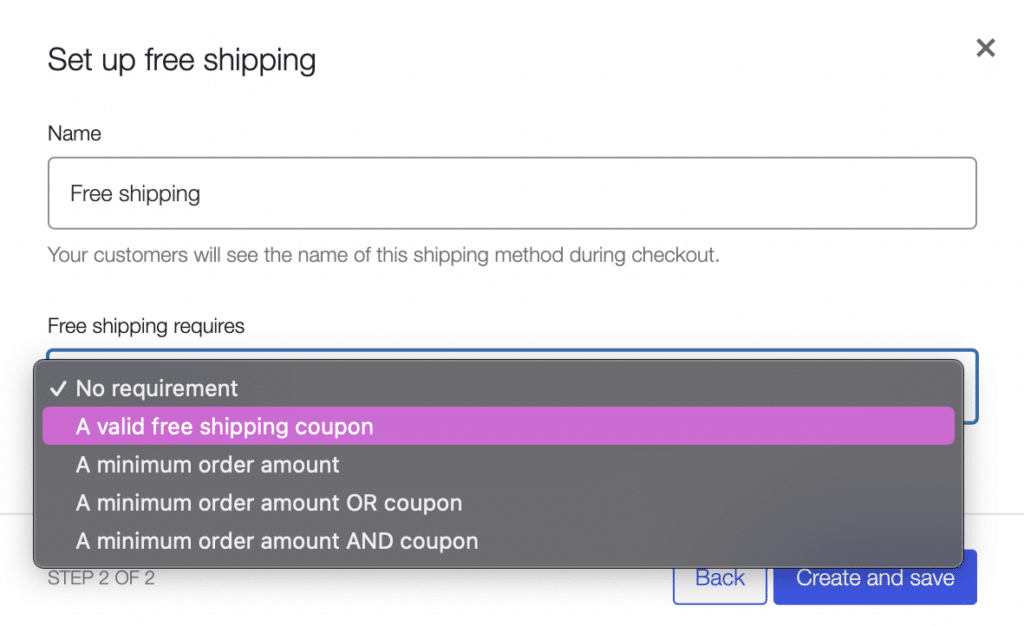
- Select Create and save when you’re done.
3. Managing existing methods
To deactivate or remove shipping methods:
- Navigate to your shipping zone.
- Click Edit to adjust any settings.

- Select the Delete button if you want to remove the zone.
- Save your changes.
P.S. Remember to stack your zones from smallest to largest area (think: zip codes, then cities, then countries). WooCommerce reads them in order, so this keeps things running smoothly. Each customer only gets matched with one zone at checkout – no double-dipping! And that “Rest of the world” zone? It’s your safety net. You can’t move or delete it, but it makes sure nobody slips through the cracks.
Before you hit publish, try placing a few test orders from different locations to make sure everything works as planned.
Get started with simpler shipping today
Every form field in your checkout is a potential roadblock to purchase. Removing unnecessary shipping steps creates a clear path to completion, turning more browsers into buyers.
But streamlined shipping is just the beginning. CheckoutWC’s complete toolkit transforms your entire WooCommerce checkout experience with customizable templates, trust badges, and abandoned cart recovery. Together, these features create the fast, friction-free checkout your customers expect.
Ready to transform your checkout experience? Get started with CheckoutWC!
The simplicity of Shopify with the power of WooCommerce. Replace your WooCommerce checkout page with CheckoutWC to boost sales and reduce cart abandonment.